Sunday, November 4, 2018

Another Vogue 8379 - Tropical Edition!

The second Vogue 8379 I sewed up had some improvements, and some failed experiments. See the first one here.

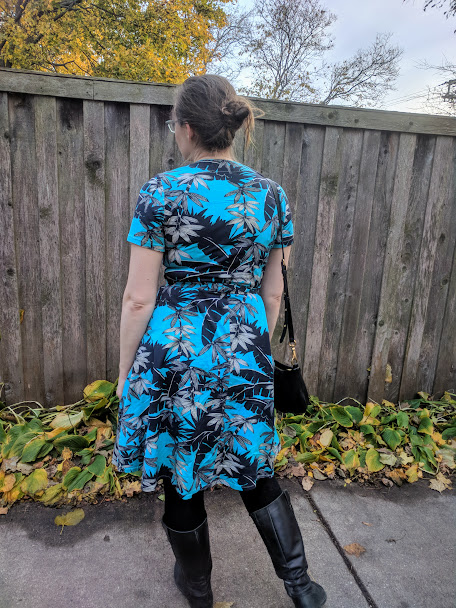
My first version had a slightly stretched out neckline, so for this one, I inserted clear elastic along the neckline between the main fabric and the facing. I think this is a solid idea, but I stretched the elastic a touch too much as I inserted it, so I have some resulting wrinkling along the neckline. It mostly gets stretched out by wear, but I wouldn't call it an improvement.

Selfie of me in my turquoise palm print Vogue 8379, showing the slight wrinkling along the neckline resulting from overly tight elastic insertion. Also, there's a lovely houseplant jungle behind me.

To combat the hard-to-ease turn-and-fold hem, I made it narrower, which also backfired. Easing a narrower hem resulted in fewer lumps and bumps of excess fabric, but also a fairly flippy hem that needs regular ironing. This is probably not helped by this being a 100% cotton jersey, as they are prone to curling.

To help with the ties crunching up, I interfaced these ones with tricot interfacing. They are definitely stabilized, but they've got no stretch now, so they can be a bit constricting about the waist.


Me in a turquoise palm print Vogue 8379, facing the camera in front of a weathered wooden fence.

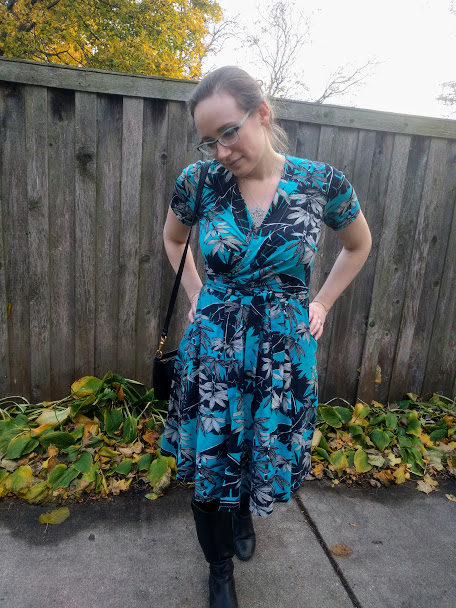
I do like this fabric a lot, even though it also performs in a more challenging manner for this particular make. This is a Max Mara cotton jersey knit with a palm print in black and turquoise. I absolutely adore the print. This fabric is 100% cotton, so it only has 20% stretch, and it's all mechanical stretch at that.

So what would I do next time? I would make this dress again, as I love the pattern. I would select a fabric with some spandex content, so it's a bit stretchier. I would skip interfacing the ties, which just made them less stretchy. I would stabilize the neckline again, but I would not stretch the elastic as I sewed. I would try a third hem option, and create a deep hem facing to avoid both the easing issues and the flippy narrow hem issues.

As it is, this dress has become a regular in my wardrobe, in spite of its flaws. Hopefully the third time is the charm, and my next one is just right!

Me in a turquoise palm print Vogue 8379, facing away from the camera, in front of a weathered wooden fence.

Me, looking off to my left in a turquoise palm print Vogue 8379. I'm standing in front of a weathered wooden fence.

Thursday, November 1, 2018

Skopelos Floral Vogue 8379

Every November, I think about participating in NaNoWriMo for a hot second, but I never do it. And I'm not doing it this year either! But I thought challenging myself to actually write a bit more was a good goal, so I'll be trying to actually use my blog this month. Expect to see a lot of things that have been in the rotation for quite a while.

Me in a blue and white striped knit Vogue 8379 wrap dress with large (roughly 4-inch) pink and red poppies printed over the stripes.

That being said, here's my first Vogue 8379! I now have two. This one is made from an Art Gallery cotton jersey called Skopelos. It was a great fit for a wrap dress. Art Gallery jersey has a nice amount of stretch, great opacity, and a beefy drape that falls fairly smoothly over curves.

Back view of my Vogue 8379, with horizontal stripes on the bodice and vertical stripes on the skirt.

Me on a street corner in my Vogue 8379 wrap dress.

You do have to watch out a bit for curly edges, but that is pretty typical for cotton-lycra jerseys. To help with this, I used Wonder Tape to stabilize the hem. It helped hold things in place, but I still think I might change up the hem next time. This pattern is a turn and fold hem, which I usually like for knits. However, the skirt on this wrap dress is essentially a circle, so there's a fair amount of excess to ease into the hem using this method. I might try a knit facing next time.

My favorite thing about this make is the pleats you build into the bodice. They disappear a bit in the final make, but they also accommodate curves, so I didn't have to do an FBA on this dress AND it fits great!

Bodice of wrap dress, with no skirt attached, showing two pleats coming up from the waistline to create extra volume near the bust.

One tricky aspect to this make - I let the neckline get stretched out a bit while sewing the facing on, which is a little difficult to avoid. You have to sew a long diagonal stretch for the neckline, and it's a little dicey trying to get the tension just right to avoid stretching anything. Once steamed and laundered a few times, it mostly went away, and the tension in the fabric from tying the wrap dress deals with any lingering issues, though.

Selfie of me in the Vogue 8379 dress from above, with a good view of the neckline. There is minimal visible stretching when it's actually being worn.

 The only other thing that was a bit tricky was also very fun - stripe placement! I spent a while looking up striped wrap dresses online. I was originally planning to have the stripes run horizontally on the skirt, but a search of RTW striped dresses revealed that vertical skirt stripes are way more common. I went with the general consensus, and I'm very pleased. I get a lot of compliments on how the stripes are laid out on this dress. Is it a weird compliment every time? Yes. Does it make me feel like I nailed it? Also yes.


Wednesday, February 28, 2018

#SMYLY2018

Cartoon: Transcript below.


Transcript:
I've always looked like someone you thought you knew...
Unremarkable, but pleasant.
Then a few years ago, I had some medical stuff I was figuring out.
In the meantime, I lost some weight.
It was weird to have a smooth stomach,
All these newly visible bones...
And it got weirder.
People who had never had anything to say before started commenting on my body. A lot.
When everything got back to normal, it didn’t seem like the same normal.
The comments about my body went away, but now it felt like they were still there, just left unstated.
Now I knew that people were noticing me, but what were they thinking. Was it good? Bad? Kind? Cruel?
It sucked. It still sucks.
But sewing lets me define the person that people see.
Sewing is a secret superpower.
Sewing lets me craft the armor that I wear to tackle the world.
So, I guess what I'm saying is...
FUCK THAT NOISE
Here's a bright, bold, pink and blue, floral and striped dress that I LOVE.
Say what you will.
#SMYLY2018


Monday, January 29, 2018

How To Trim PDF Patterns

Scissors, printed PDF pattern for Helen's Closet Blackwood Cardigan, and Fiskars paper trimmer.

Just a quick post today! I recently acquired a paper cutter, and I wanted to share how I trim PDFs using it. It took me a few tries to figure out a method that was both quick and effective, but I like the one I've settled on.

All you need is a pair of scissors, a paper trimmer, and your pattern. I'm cutting out the pattern for the Helen's Closet Blackwood Cardigan!

Scissors, printed pattern, and paper trimmer.

First, I trim off each of the corners, intersecting with the corner of the rectangle that needs to be cut out. It's like a tangent line, except with a rectangle in lieu of a circle.

Scissors cutting off the corner of a paper pattern piece.

Paper pattern page with corner cut off, intersecting with the corner of the usable pattern.

Then, I set to work with my paper trimmer.

Align the cutting line on the pattern with the lower cutting edge of the paper trimmer. The beauty of cutting off the corners is that it makes aligning the cut line super easy! No eyeballing from an inch away. You may want a bright light so that you can see the cutting edge of the paper trimmer.

Pattern page sitting on a paper trimmer with trimming blade raised.

Pattern page sitting on a paper trimmer, cutting line aligned with trimming line.

Once everything is aligned, just hold the paper in place and trim away!

Paper trimmer blade intersecting with the cutting line on the pattern page.

I like to repeat this action for each side, even though a lot of PDFs recommend trimming only two sides. I find having every side trimmed off and taping sheets next to each other (instead of overlapping sheets) makes the pattern easier to fold up later.

Scissors, printed PDF pattern with a trimmed page, and paper trimmer.

Hope this was helpful!